This document describes how to use the Visual Studio code Extension to write animations for the Mozaïk system.
Installation of the extension
To use the extension, you have to download Visual studio Code:
You can download the extension here:
To install the extension, go to the Extensions page of Visual Studio Code, then click on the Install from VSIX button from the menu.
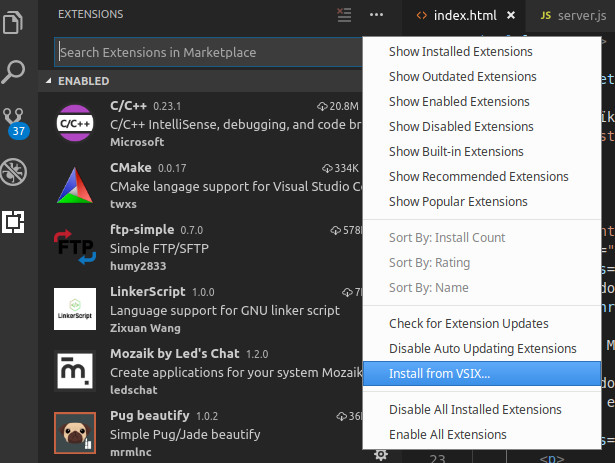 When the extension is installed, you can use the new commands with the shortcut View -> Command Palette... and the Mozaik prefix.
How to use the SDK
New animation
Open a new folder (Ctrl+K Ctrl+O) then start the command Init a new HTML application. This command init the following files:
 app.json
{
    "name"        : "Application name",
    "description" : "Application description",

    "app" :
    {
        "type" : "change",
        "id"   : "Streaming with interpolation"
    },

    "com" :
    {
        "type" : "html5",
        "page" : "index.html"
    }
}
index.html
<!DOCTYPE html>
<html>
    <head>
        <meta charset="utf-8"/>
        <title>Title</title>

        <style>
            body
            {
                background: white;
                padding: 0;
                margin: 0;
            }
        </style>
    </head>

    <body>

    </body>
</html>
The app.json file describes the animation. The name and description fields are mandatory and are used in the gateway administration interface. The app section describes the embedded software used with the Tiles system. If you use a Line or DMX system this section is not important. Here Streaming with Interpolation is used to stream the HTML page. Finally, the com section describes which content is streamed. The html5 type is used to stream HTML pages, and the file field defines the entry point of the animation.
Here you can find two full examples:
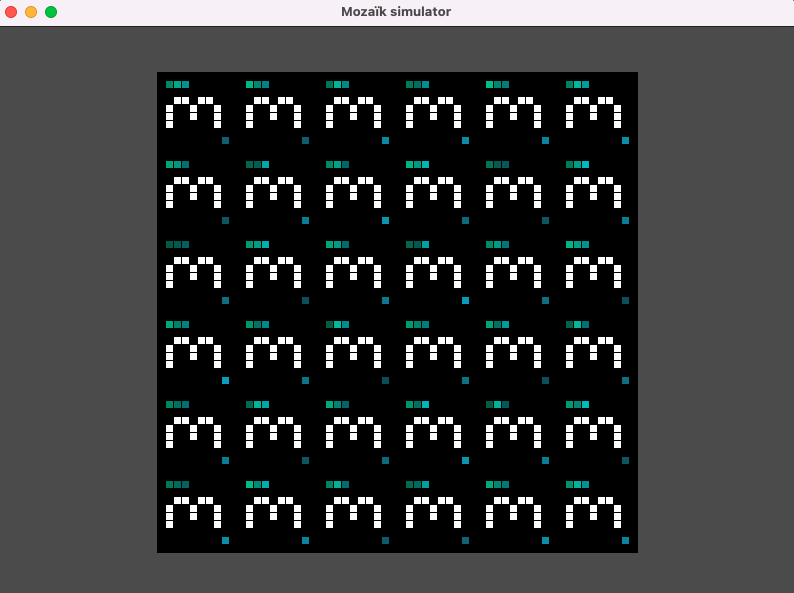
Start the animation
Use the Start command to start the animation. The simulator is automatically started, then Visual Studio Code is connected to
the debugger of the HTML page. You can also use the debugger
with the page http://127.0.0.1:9229 on a Chrome browser.
To Add or remove tiles, hold the Ctrl key then use the left or right click of the mouse. The topology can be saved with the File -> save topology menu. The Tools -> Capture menu can be used to make video or image captures of the current animation.
Edit an animation
The dimensions of the HTML page are computed from the bounding box of the topology. You can use all the standard web tools to make your animation. For example with a div you can light up a tile with the red color:
index.html
<!DOCTYPE html>
<html>
    <head>
        <meta charset="utf-8"/>
        <style>
            body
            {
                background: black;
            }

            div
            {
                background: red;
                position: fixed;
                top: 0;
                left: 0;
                width: 10px;
                height: 10px;
            }
        </style>
    </head>
    <body>
        <div></div>
    </body>
</html>
Or with a canvas, you can draw arbitrary shapes:
index.html
<!DOCTYPE html>
<html>
    <head>
        <meta charset="utf-8"/>
        <style>
            body
            {
                background: black;
                margin: 0;
            }
        </style>
    </head>
    <body>
        <canvas id="canvas"></canvas>
        <script>
            const canvas = document.getElementById('canvas')
            const context = canvas.getContext('2d')
            canvas.width = window.innerWidth
            canvas.height = window.innerHeight

            context.strokeStyle = 'blue';
            context.beginPath();
            context.arc(canvas.width / 2, canvas.height / 2, canvas.width / 2, 0, 2 * Math.PI);
            context.stroke();
        </script>
    </body>
</html>
There is a lot of existing tools you can use, for example:
When you are satisfied with your animation, you can restart it with the Start command.
SDK functions
You can use several functions to ease the development of your animations. These functions are added by the SDK to the window object.
window.topology()
This function is used to get the topology of the panel with the following object structure:
topology.js
const top =
{
    matrix:
    [
        [ 1, 1, 1, 1, 1 ],
        [ 1, 1, 1, 1, 1 ],
        [ 1, 1, 1, 1, 1 ],
        [ 1, 1, 1, 0, 0 ],
        [ 1, 1, 1, 1, 1 ]
    ],
    width: 5,
    height: 5
}
Where 1 are tiles and 0 are not. This function can be used to make adaptative animations, such that the content is generated according to the topology.
window.Persistent()
This class can store persistent files, even if the animation is updated. It can be used to save configurations files, or images from the webcam for example. The standard API LocalStorage can also be used for small data, but is will be lost if you change the name of the HTML file of your animation.
persistent.js
async function main()
{
    const p = new window.Persistent()

    // Save text data
    await p.putJSON('data.txt', 'Hello world')
    // Save JSON data
    await p.putJSON('config.json', { infos: 'my config' })
    // Save binary data
    await p.putBuffer('bin/data1.bin', new Uint8Array([0xAA, 0xBB, 0xCC]))
    await p.putBuffer('bin/data2.bin', new Uint8Array([0x11, 0x22, 0x33]))
    // Get the list of file names in a folder
    const list = await p.list('bin')
    // Get text data
    const text = await p.getText('data.txt')
    // Get JSON data
    const json = await p.getJSON('config.json')
    // Get binary data
    const bin = await p.getBuffer('bin/data1.bin')

    // Access to the file with an URL
    await fetch('persistent://bin/data1.bin')
}

main()
Send an animation to a gateway
When your animation is finished, you can send it to a gateway to test it with your Tiles / Line / DMX system.
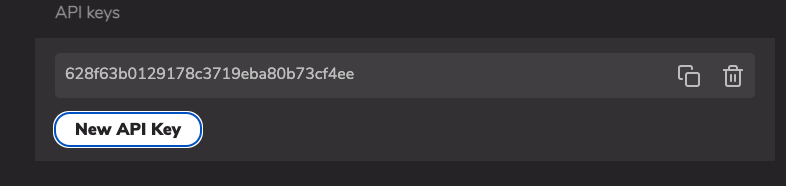
To do that, you have to retrieve an API key from your gateway. First you have to connect to the administration interface
with the Open the gateway admin page command. In the Settings menu, click on the New API Key button to generate
a new key.
To send an animation to a gateway, use the Upload the app to a gateway command and enter the API key. You can then found the animation entry in the animation list of the administration page.